
You can face-swap a video with AI for free in about 60 seconds — or spend an afternoon fighting blurry, flickering output because you picked the wrong tool and the wrong settings. The route you choose matters more than the app you choose. This guide walks both free routes step by step, and hands you the exact settings creators actually use so your result doesn't scream "AI."
Key takeaways
- Two free routes. An online tool (no install, ~60 seconds, best for short clips) or local FaceFusion (free, truly unlimited, best for long clips and full control).
- The settings that matter most: in FaceFusion, bump Pixel Boost to 512, drop the enhancer blend to ~50, and raise Reference Face Distance to 0.6 so the swap holds when the head turns.
- Most "unlimited" online plans aren't. Genuinely uncapped = running open-source software locally, at the cost of setup and a decent GPU (8 GB VRAM minimum).
- Your source clip beats every parameter. A sharp, front-facing face on a low-motion clip does 90% of the work.
The two free routes at a glance
| Route A — Online tool | Route B — Local FaceFusion | |
|---|---|---|
| Setup | None (browser) | Install once (~15 min) |
| Cost | Free tier | 100% free, no cap |
| Best for | Short clips, quick memes | Long clips, full control |
| Limits | Per-clip / hourly caps | Only your hardware |
| Quality control | Automatic | Every parameter is yours |
| Needs a GPU? | No | Yes (8 GB+ VRAM) |
Want a clip done now? Start with Route A. Want unlimited swaps and editorial-grade output? Route B is worth the one-time setup.
Route A: swap a face in a video online (the fast way)
Online swappers are the quickest start — no GPU, no download, and in the best cases no account. I'll use Aiface Swap to show the flow because it does video with no sign-up and no watermark, so nothing gets in the way.
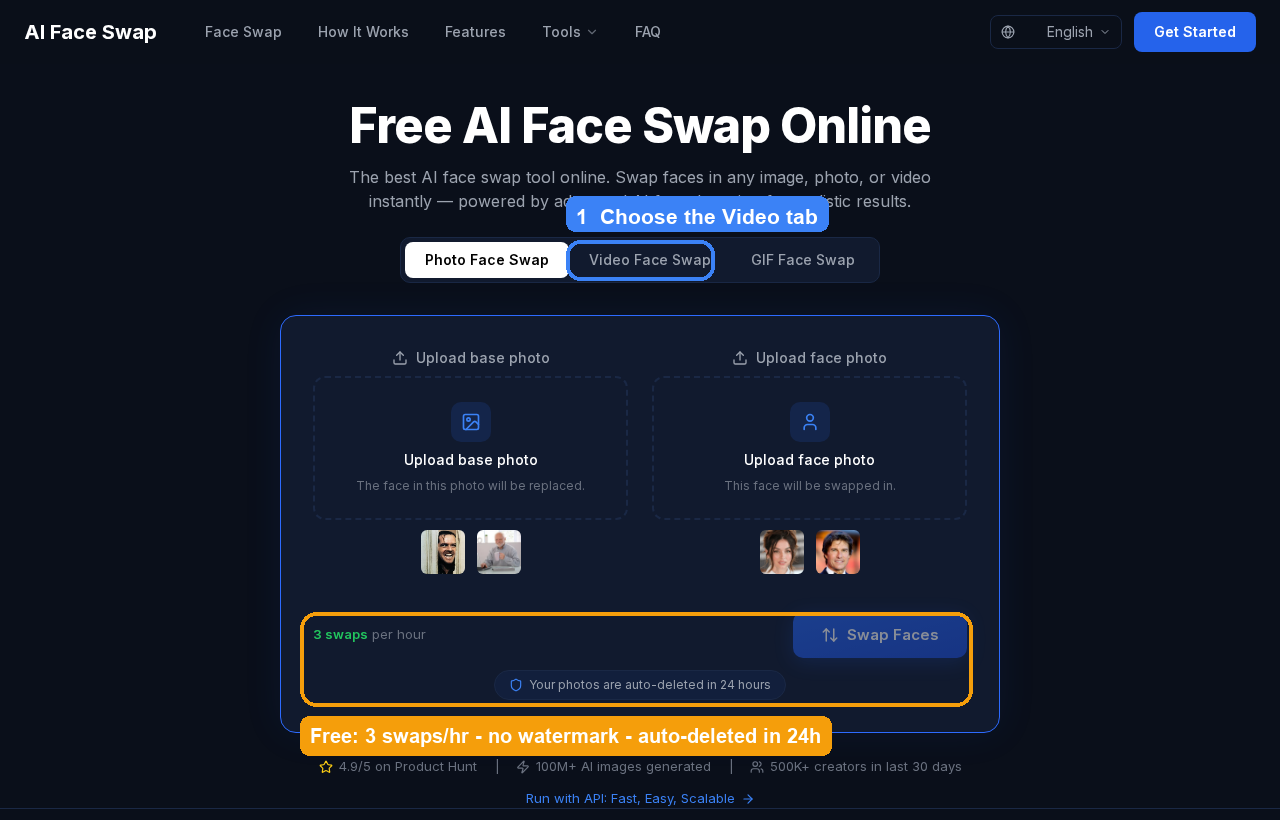
Here's the whole process:
- Pick the Video Face Swap tab. It sits between Photo and GIF — make sure you're on Video.
- Upload the target video. This is the clip whose face gets replaced. Shorter, well-lit clips with the face clearly visible swap far more cleanly.
- Upload the face photo. Use a sharp, front-facing close-up. Skip sunglasses, hair across the face, or motion blur — the detector needs one clean face.
- Run it, then download. The AI detects and replaces the face in every frame. Free tiers cap you (here, 3 swaps an hour), and uploads auto-delete after 24 hours.
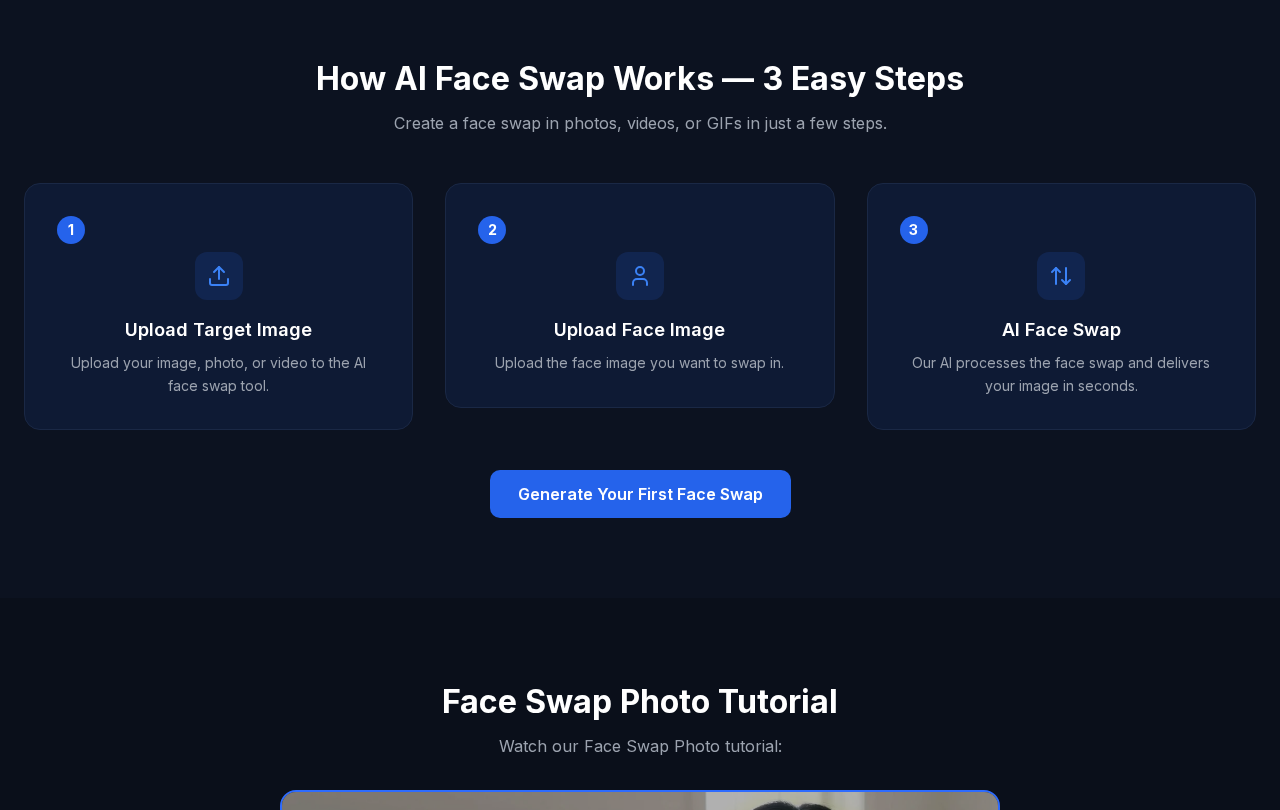
Online tools shine on short clips. The catch is always a limit, and the honest ones tell you what it is — some cap free clips at 15 seconds, and even local tools like Roop and Visomaster cap a clip at 60 seconds. If your clip runs longer than a minute, or you want frame-level control, go local.
Tempted by an "unlimited free" online tool? Read what actually works for unlimited video swaps first — most "unlimited" badges don't survive contact with reality.
Route B: FaceFusion for free, unlimited swaps
The only route with no cap at all is running open-source software on your own machine. As one practitioner put it on Reddit, "if you really want 'unlimited,' your only real option is renting a powerful GPU and running open-source stuff… setup is a pain and not beginner-friendly." The most approachable of these tools is FaceFusion. (If you'd rather use the classic power-user deepfake toolkit, DeepFaceLab is the veteran option — a steeper learning curve, but maximum control over training and output.)

Install it (the easy way)
You don't need GitHub or a terminal. The simplest path is Pinokio, a one-click installer: open its Discover tab, find FaceFusion 3, and click Install → Run default → UI default. If you'd rather not use Pinokio, FaceFusion's own docs point beginners to a dedicated Windows or macOS installer (a manual install "needs technical skills and is not recommended for beginners"; if you do go manual, run Python 3.12 to avoid dependency conflicts). Once it launches, a browser UI opens where you drop in your target video and source face. The first swap downloads the model files, so give it a minute — after that they're cached locally and every run is offline and unlimited.
The settings that make or break your swap
This is where a local swap goes from "obviously fake" to "wait, that's real." The values below come from FaceFusion's official docs plus creators who've stress-tested them in a detailed settings walkthrough. Here's the whole flow at a glance:
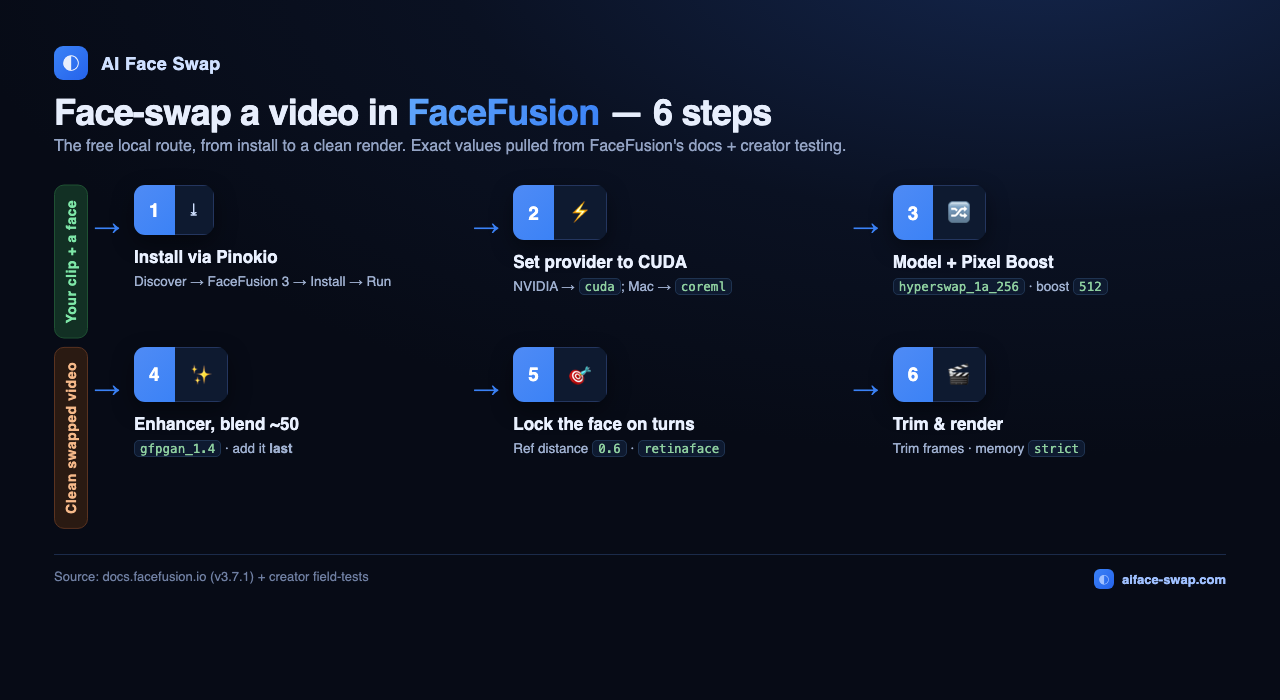
And here are the exact values as a quick reference you can copy:
| Setting | Default | Set it to | Why it matters |
|---|---|---|---|
| Execution provider | Auto | CUDA (NVIDIA) / CoreML (Mac) | CPU is "desperately, painfully slow" |
| Face swapper model | inswapper_128_fp16 | hyperswap_1a_256 | Best balance of speed and expression |
| Pixel Boost | 128×128 | 512×512 · 1024 for close-ups | The single biggest quality lever |
| Face enhancer | gfpgan_1.4 · blend 80 | blend ~50 (25 w/ high boost), added last | Blend 80 looks plasticky |
| Reference face distance | 0.3 | 0.6 | Keeps the swap locked as the head turns |
| Face detector | yoloface | retinaface for hard angles | Stops single-frame original-face flashes |
| Video memory strategy | moderate | strict | Prevents an out-of-memory crash mid-render |
The settings that matter most, in plain terms:
- Execution provider — the one click that saves hours. On an NVIDIA card, set this to CUDA; on Apple Silicon, CoreML. Leave it on CPU and, in the words of one guide, "your processing speed is going to be desperately, painfully slow."
- Face swapper model. The default is
inswapper_128_fp16. Many creators now preferhyperswap_1a_256for its balance of speed and expression tracking — but plenty still swear by inswapper. Try both on your clip and keep the cleaner one. - Pixel Boost — the single biggest quality lever. This is the internal resolution the swapper works at, and it defaults to a tiny
128×128. Bumping it from 256 to 512 is, per a pixel-boost test, "the difference between that blurry obviously AI look and capturing crisp realistic details in the eyes." Reserve 1024 for tight close-ups; higher settings cost VRAM and render time. - Face Enhancer — add it last, and turn it down. The enhancer (
gfpgan_1.4) runs after the swap, and its blend defaults to 80, which looks plasticky. Set it to about 50 (or 25 with a high pixel boost), and place it last in the processing chain. - Face selector & detector — keep the swap locked as the head turns. Leave the selector on
referencemode and raise Reference Face Distance from 0.3 to 0.6 so the AI stays tolerant as the face turns. For hard angles, switch the detector fromyolofacetoretinaface.
Fix the 5 things that make a video swap look fake
Video is harder than photos because the face moves, changes expression, and gets occluded. Here are the exact fixes for the failures you'll actually hit — all from the same hands-on FaceFusion settings guide:
- The face flickers back to the original on a turn. The three-part fix: switch the detector to
retinaface, lower its score, and raise the reference distance so the swap stays tolerant through the turn. - A hard seam across the forehead or hairline. Add a small top value to Face Mask Padding to extend the swap over the seam, then enable the enhancer to blend the border.
- A mic, hand, or glasses smears across the face. Set the Face Mask Type to
occlusion(with thexsegoccluder) so anything passing in front of the face is masked out instead of painted over. - The swapped face looks frozen. Add the Expression Restorer (a
live_portraitmodel) to bring movement back — higher factor means richer expression but more distortion. - The eyes look weird in action shots. The eyes are the weakest part of any swap. On high-motion footage, only swap the frames where the face is clearly visible, then stitch those shots back in a video editor.
Two more that save a render: if the output melts or flickers on a live swap, you likely have a bad build — re-download the correct inswapper_128_fp16.onnx. And if FaceFusion halts at "100% analysing," that's not a bug — it's the built-in NSFW gate, confirmed in the FAQ.
Online or local — which actually looks better?
Here's the honest part most tool pages won't tell you: a lot of free online swappers run on the same aging engine, so their output looks nearly identical. In one hands-on test of roughly ten platforms, the reviewer found many of them "produced pretty much all the exact same results" — the same slightly fuzzy face. That has two implications:
- For casual clips, the brand barely matters. A quick meme or reaction clip will look about the same on most online tools, so pick the one with the fewest catches — no sign-up, no watermark — and move on.
- For anything demanding, local wins on control. FaceFusion isn't magic out of the box, but because you control Pixel Boost, the enhancer, and the masks, you can push it well past what a one-click web tool will give you. That's the whole reason to install it.
If your clip is short and forgiving, Route A is genuinely good enough. If it's long, high-motion, or headed somewhere that matters, the extra 15 minutes on Route B pays off.
How long it takes (and the hardware you need)
Set expectations before you hit render. FaceFusion treats 8 GB of VRAM as the bare minimum, with 12 GB+ recommended; a common rig is an RTX 3060 12 GB. Render time scales hard with Pixel Boost — on an 8 GB card, a heavy workflow can take roughly 6–7 minutes per second of video, so a 10-second clip is a coffee break, not an instant export. Two ways to keep it sane:
- Trim first. Use Trim Frame Start / End to render only the segment you need. One creator cut a 38-second video down to about 200–250 frames to output a 9-second clip instead of processing the whole thing.
- Set Video Memory Strategy to
strictfor the final long export so the GPU doesn't run out of memory and crash an hour into a render.
For output, libx264 at quality 80 with the veryfast preset is a safe default; switch to h264_nvenc on NVIDIA to speed up the final mux. That combination of trimming, strict memory, and a hardware encoder is the difference between a render that finishes and one that dies at 90%.
The one input that beats every setting
You can dial in every parameter above and still get a bad result if the footage fights you. The highest-leverage choice is the target clip itself: creators consistently find that a face without a lot of difficult movement gives the cleanest first generation. Prefer clips where the subject faces the camera, is evenly lit, and isn't mid-shout or turning fast. For the source face, use a sharp, front-facing close-up — the swapper works at low internal resolution, so a small or blurry source face has nothing to rebuild from.
One note on responsible use: FaceFusion ships a hard NSFW gate, and swapping a real person's face into a video without consent can be illegal depending on where you live. Swap faces you own or have permission to use, and label synthetic media where it matters.
Swap your first video face with Aiface Swap
If you want speed, go online; if you want control, go local. In both cases, a sharp source face plus the right settings does most of the work. The fastest way to see that for yourself is to try a free video face swap on Aiface Swap — no sign-up, no watermark, done in under a minute.
From there, go deeper: browse the 8 best free AI face swap tools, see how the top options stack up in our honest tool comparison, or learn how to get clean results on photos.